| d'Armond's Home | |
| Klingon | |
| Cozy Mark IV |
|
| Linguistics | |
| FTS |
Cozy Mark IV : Chapter 03
Education
I'm also accounting for time/cost in this chapter of setting up my workshop. For me, this first means finishing my garage (adding fiberglass insulation, drywall, painting, adding some pegboard, etc). The next step will be building the parts described in the chapter, including the work table, expoxy balance, glass cabinet, etc.
Pictures and commentary will go here as the work progresses. See also time and expenses related to this chapter.
Home | To Chapter 4 ->
| Here's a shot of my jig table and work area. You can see my thermometer and clock on the wall, my plans on the table, my pegboard, etc. Note the walls have all been covered with drywall and painted. The section of wall to the right of the thermometer, where you can see a line going up and down, is a section that the builders had drywalled, not us. They did such a horrible job! Now I know what to look for the next time we buy a house! | 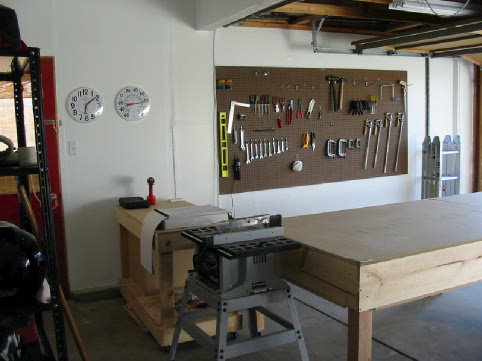 |
| This is a better shot of my jig table. You can tell from this shot that I made it as two 6x4 tables that lock together to make a single, 12x4 work area. It's also on locking casters. |  |
| Here's a close-up of where the two jig tables lock together. I've also put corner protectors on each corner of the tables. | 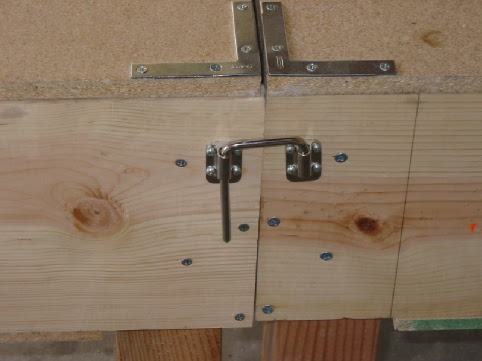 |
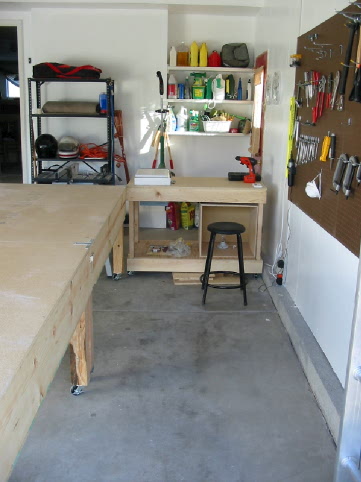
| Here's another shot of the work area. I
made a 2nd work table, since there will be times when the jig table will be completely in
use. You can see the epoxy hotbox underneath, currently awaiting foam insulation and
a door. This is just a two-car garage setup. I've got about 1/2 of the garage occupied with the jig table and work area. The other half currently is home to some bicycles, a lawn mower, a stand-up freezer, and a few other oddments. Not sure at this point whether I'll need to build some kind of shed in the yard for these kinds of things, or whether the current space will be sufficient. We'll just see as we go along. |
 |
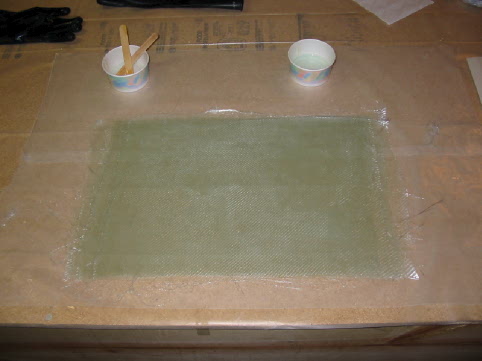
| This is the first practice layup, in the process of curing.
It looks like there are some white, dry areas, but that's just the lights. There's no "Chapter 3" grouping of materials to purchase from Wicks. I was hoping that the chatper 4 materials would include enough epoxy, glass and foam to do the rest of the practice layups from chapter 3, but alas, this doens't seem to be the case. |
 |
| I finally built a cabinet for my figerglass cloth. This is based on Rick Maddy's table, where the legs fold out when you open the door. | 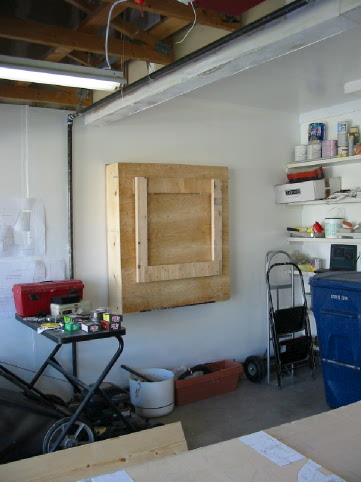 |
| It's rather big, much bigger than it needs to be for the purpose of holding the glass cloth. But the larger size means that I have a larger class cutting area when it's open. We'll see over time how this works out, if it's a good thing or whether it's just unnecessarily big. | 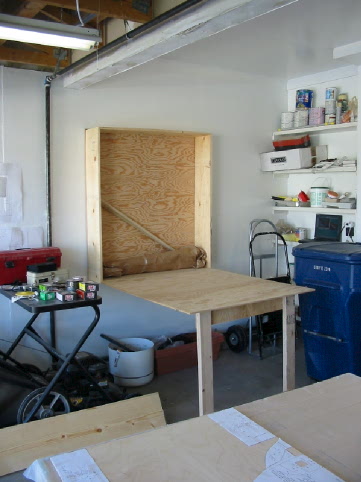 |
| Copyright (c) 2003, d'Armond Speers All Rights Reserved |
Last modified: Sunday, February 13, 2005 |